Installation
This guide explains how to install the Universal Snippet on your website and set up Pollls so it works properly.
Prerequisites
Before you begin, make sure you have:
- An Arena account with a registered site.
- Access to your website’s HTML code or CMS admin where the widget will appear.
When to use this method
- Your website has simple, consistent URLs. Requires low to none technical knowledge.
- You don’t need to customize how URLs are handled.
Steps
1. Access Arena's Dashboard
Navigate to Widgets > Polls > Installation> Get Code in your Arena account.
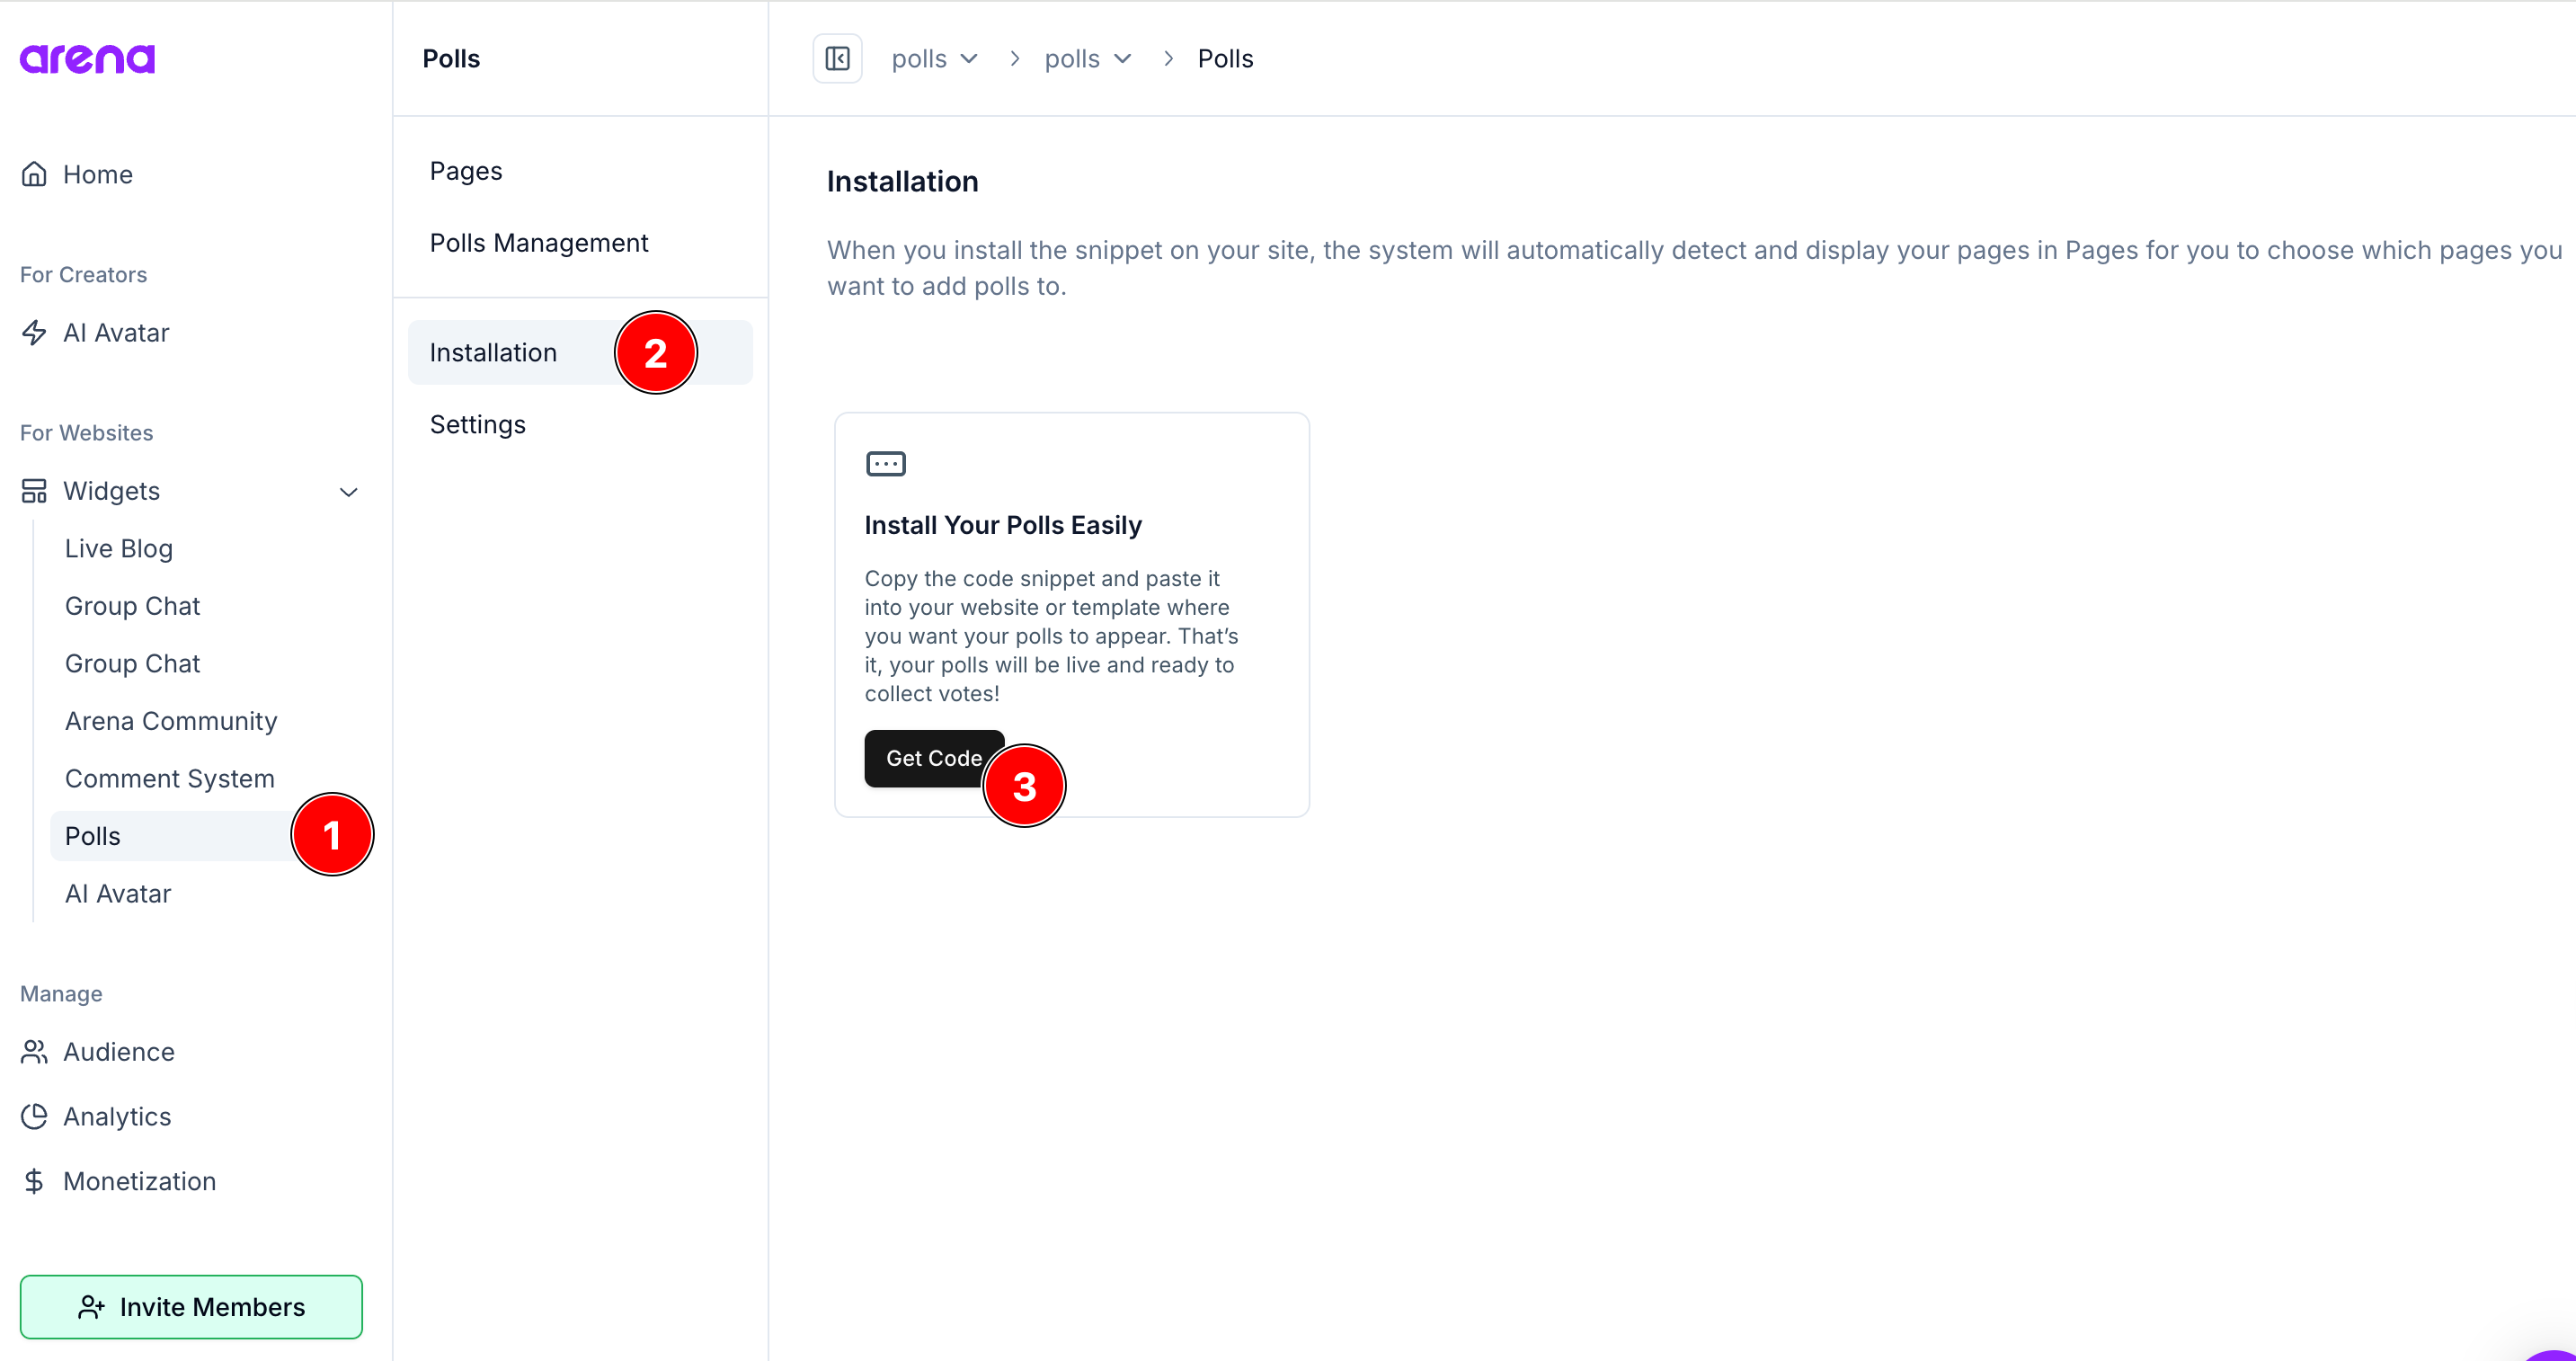
2. Add the main script to the website
Add the main script to the <head> of your website:
<script async src="https://fast.arena.im/script.js?siteId=[YOUR-SITE-ID]"></script>The parameter[YOUR-SITE-ID] will automatically be filled with your account information when copying this information from the dashboard panel.
RecommendationWe recommend placing the main script on all pages of your website. This will improve the analytics features and provide better user behavior insights
3. Add the div snippet to the Polls
The snippet must be added to the template or master page of the posts so that it is automatically included in each post. It's also possible to add snippet individually to specific blog posts if you don't want it to appear on all of them.
<div class="arena-poll-widget" data-site-slug="[YOUR-SITE-SLUG]"></div>The parameter[YOUR-SITE-SLUG] will automatically be filled with your account information when copying this information from the dashboard panel.
4. Managing the indexed pages of your site
In the dashboard, go to the Pages tab.
This page displays all the pages where the div has been inserted.
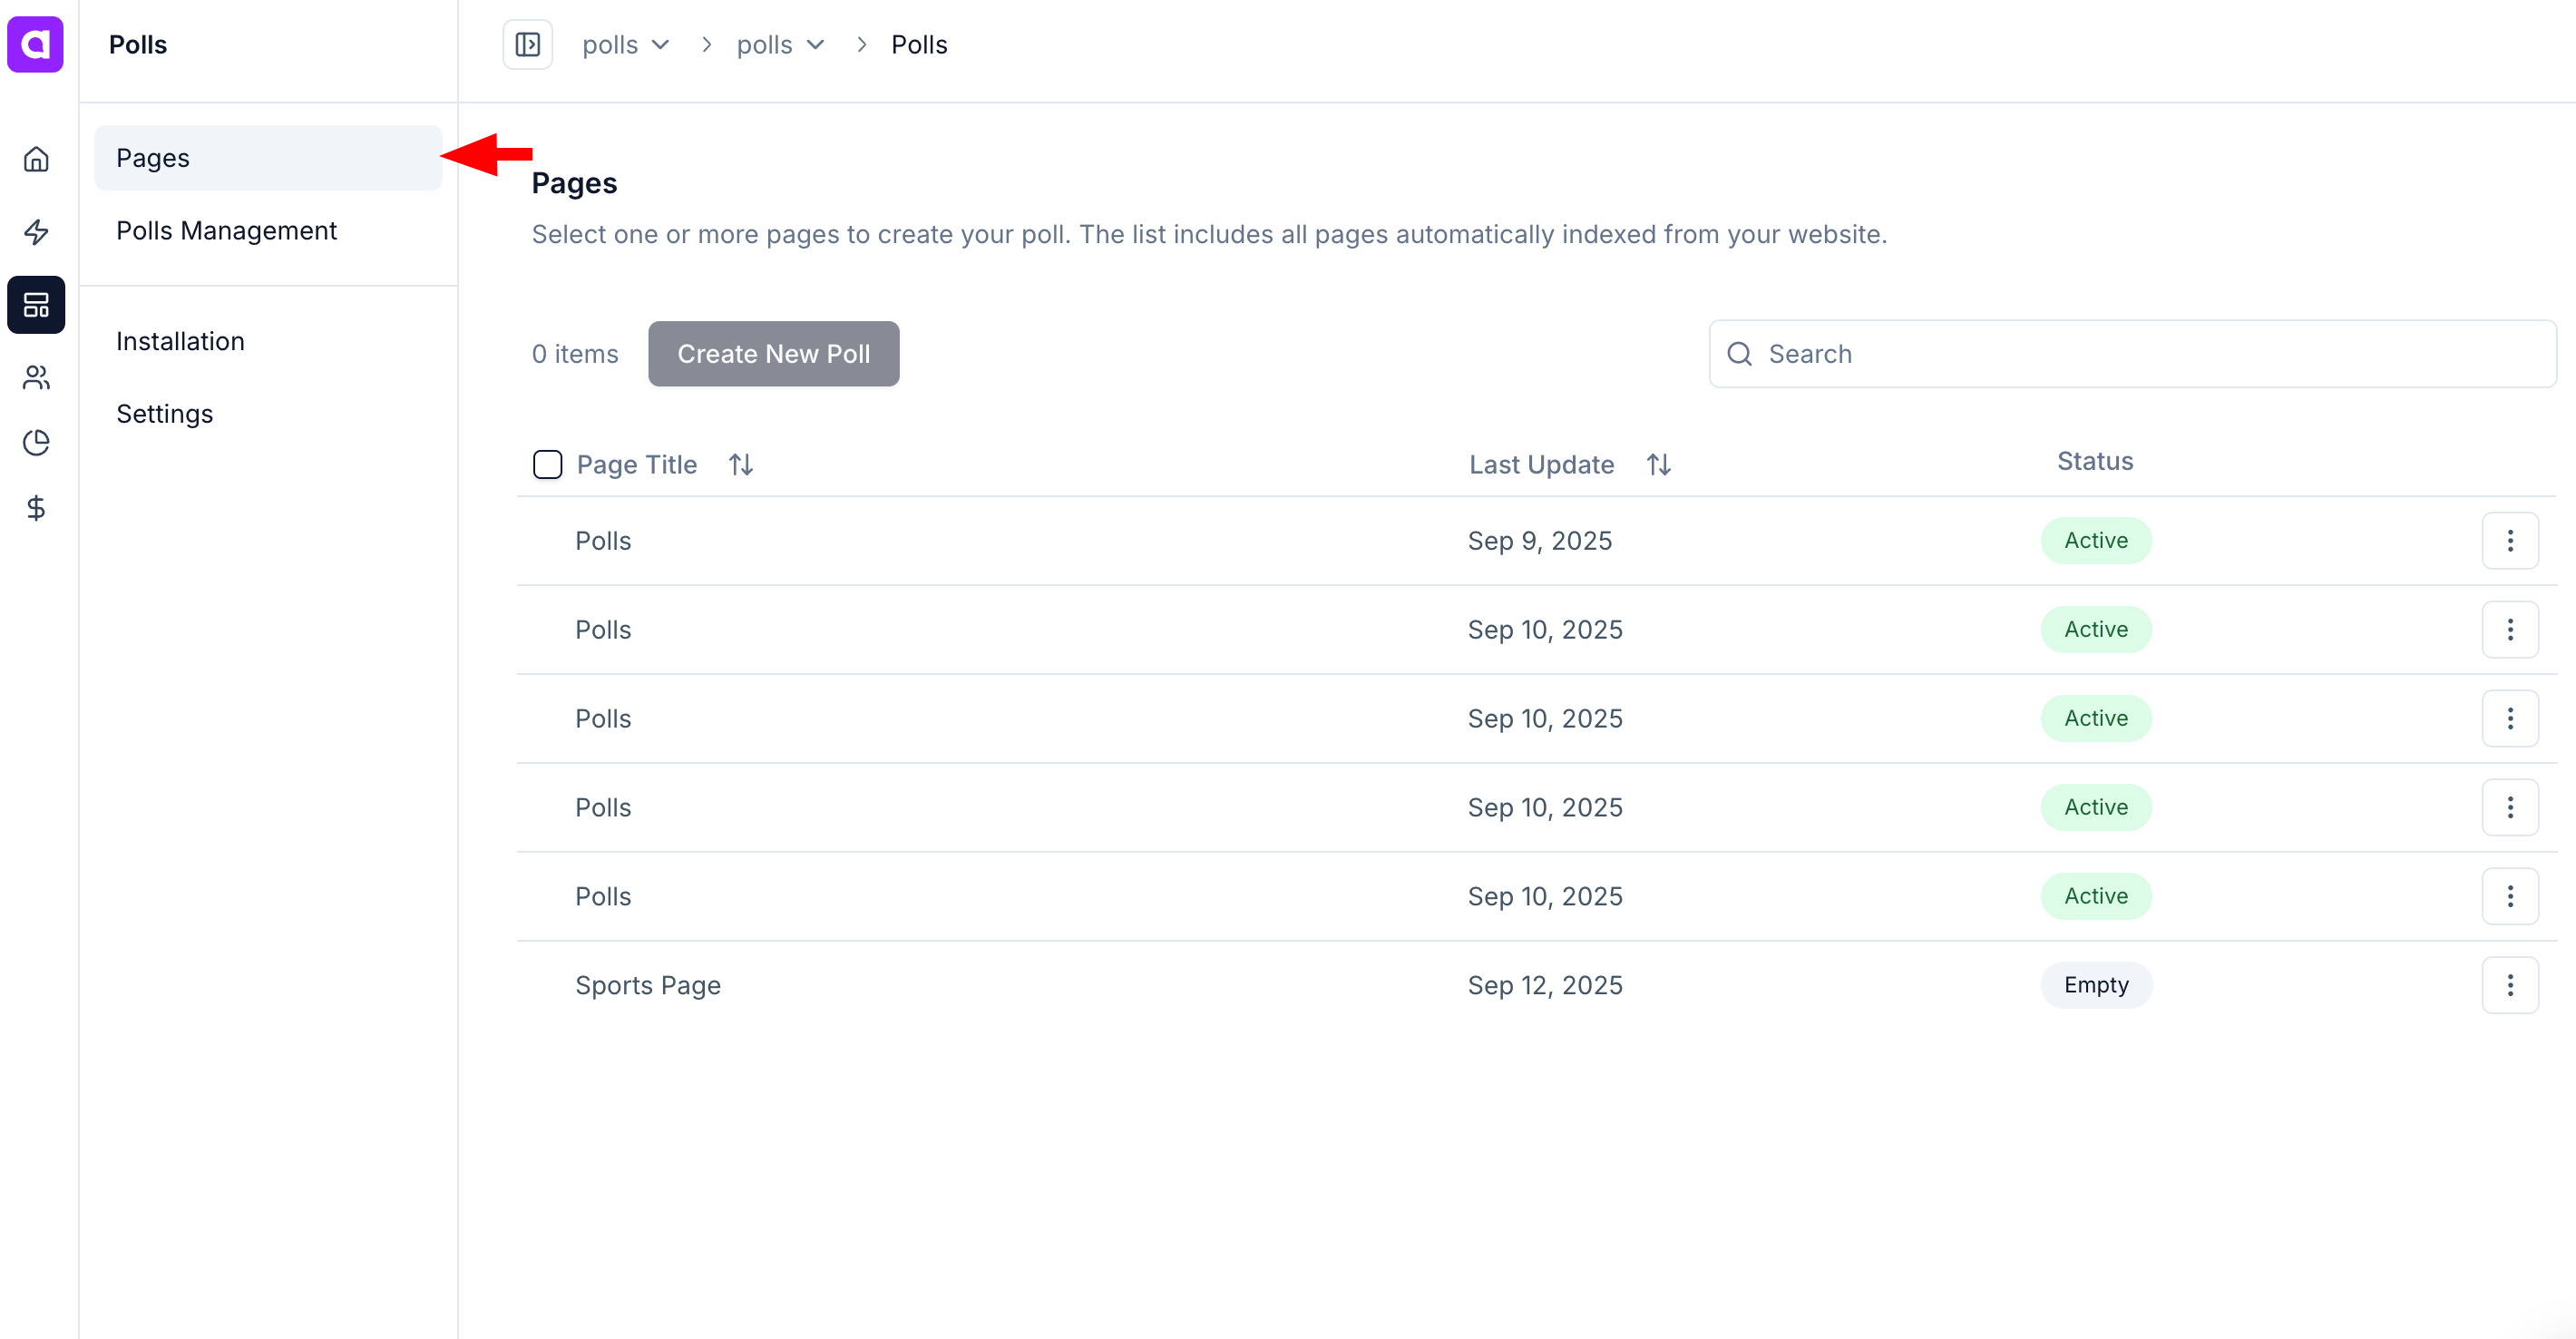
NoteFor the page to appear in the dashboard, it must be loaded at least once with our div.
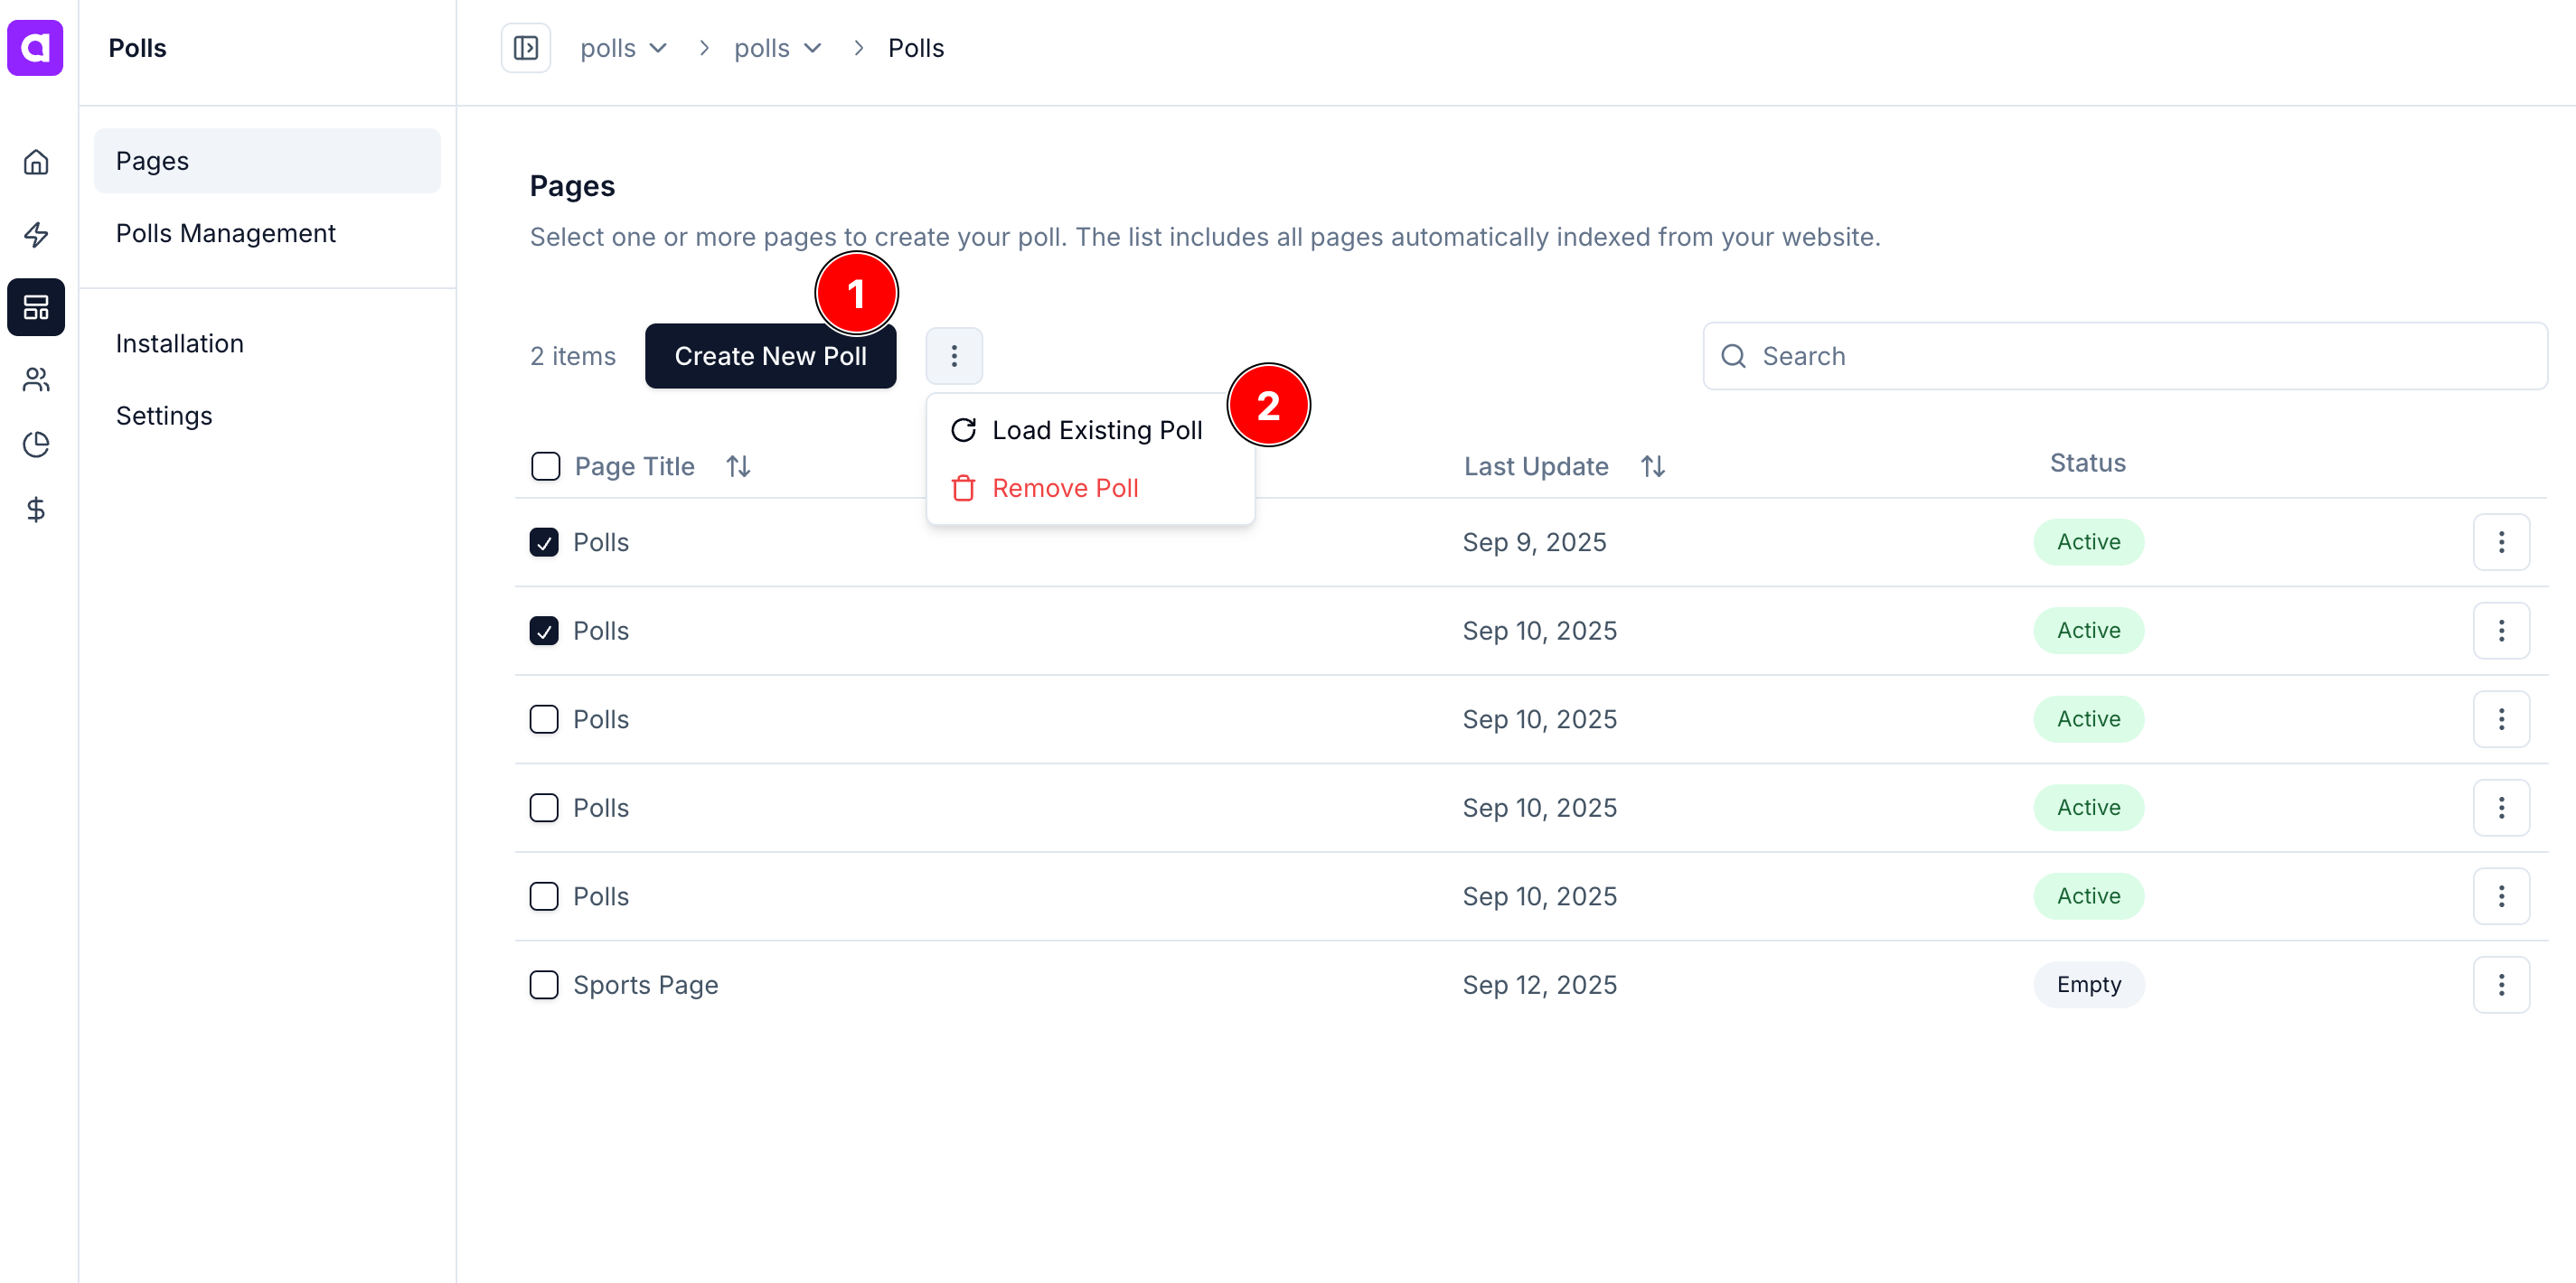
In the Pages tab, you can also select the desired pages, create a new poll, or load existing polls into the selected pages.
You can also view the status of each page:
- Active → The page has polls associated with it.
- Empty → The page has no polls associated.
Additionally, you can perform bulk actions, such as removing polls from one or multiple pages, or associating polls with selected pages.
5. Managing the created Polls and tracking their progress
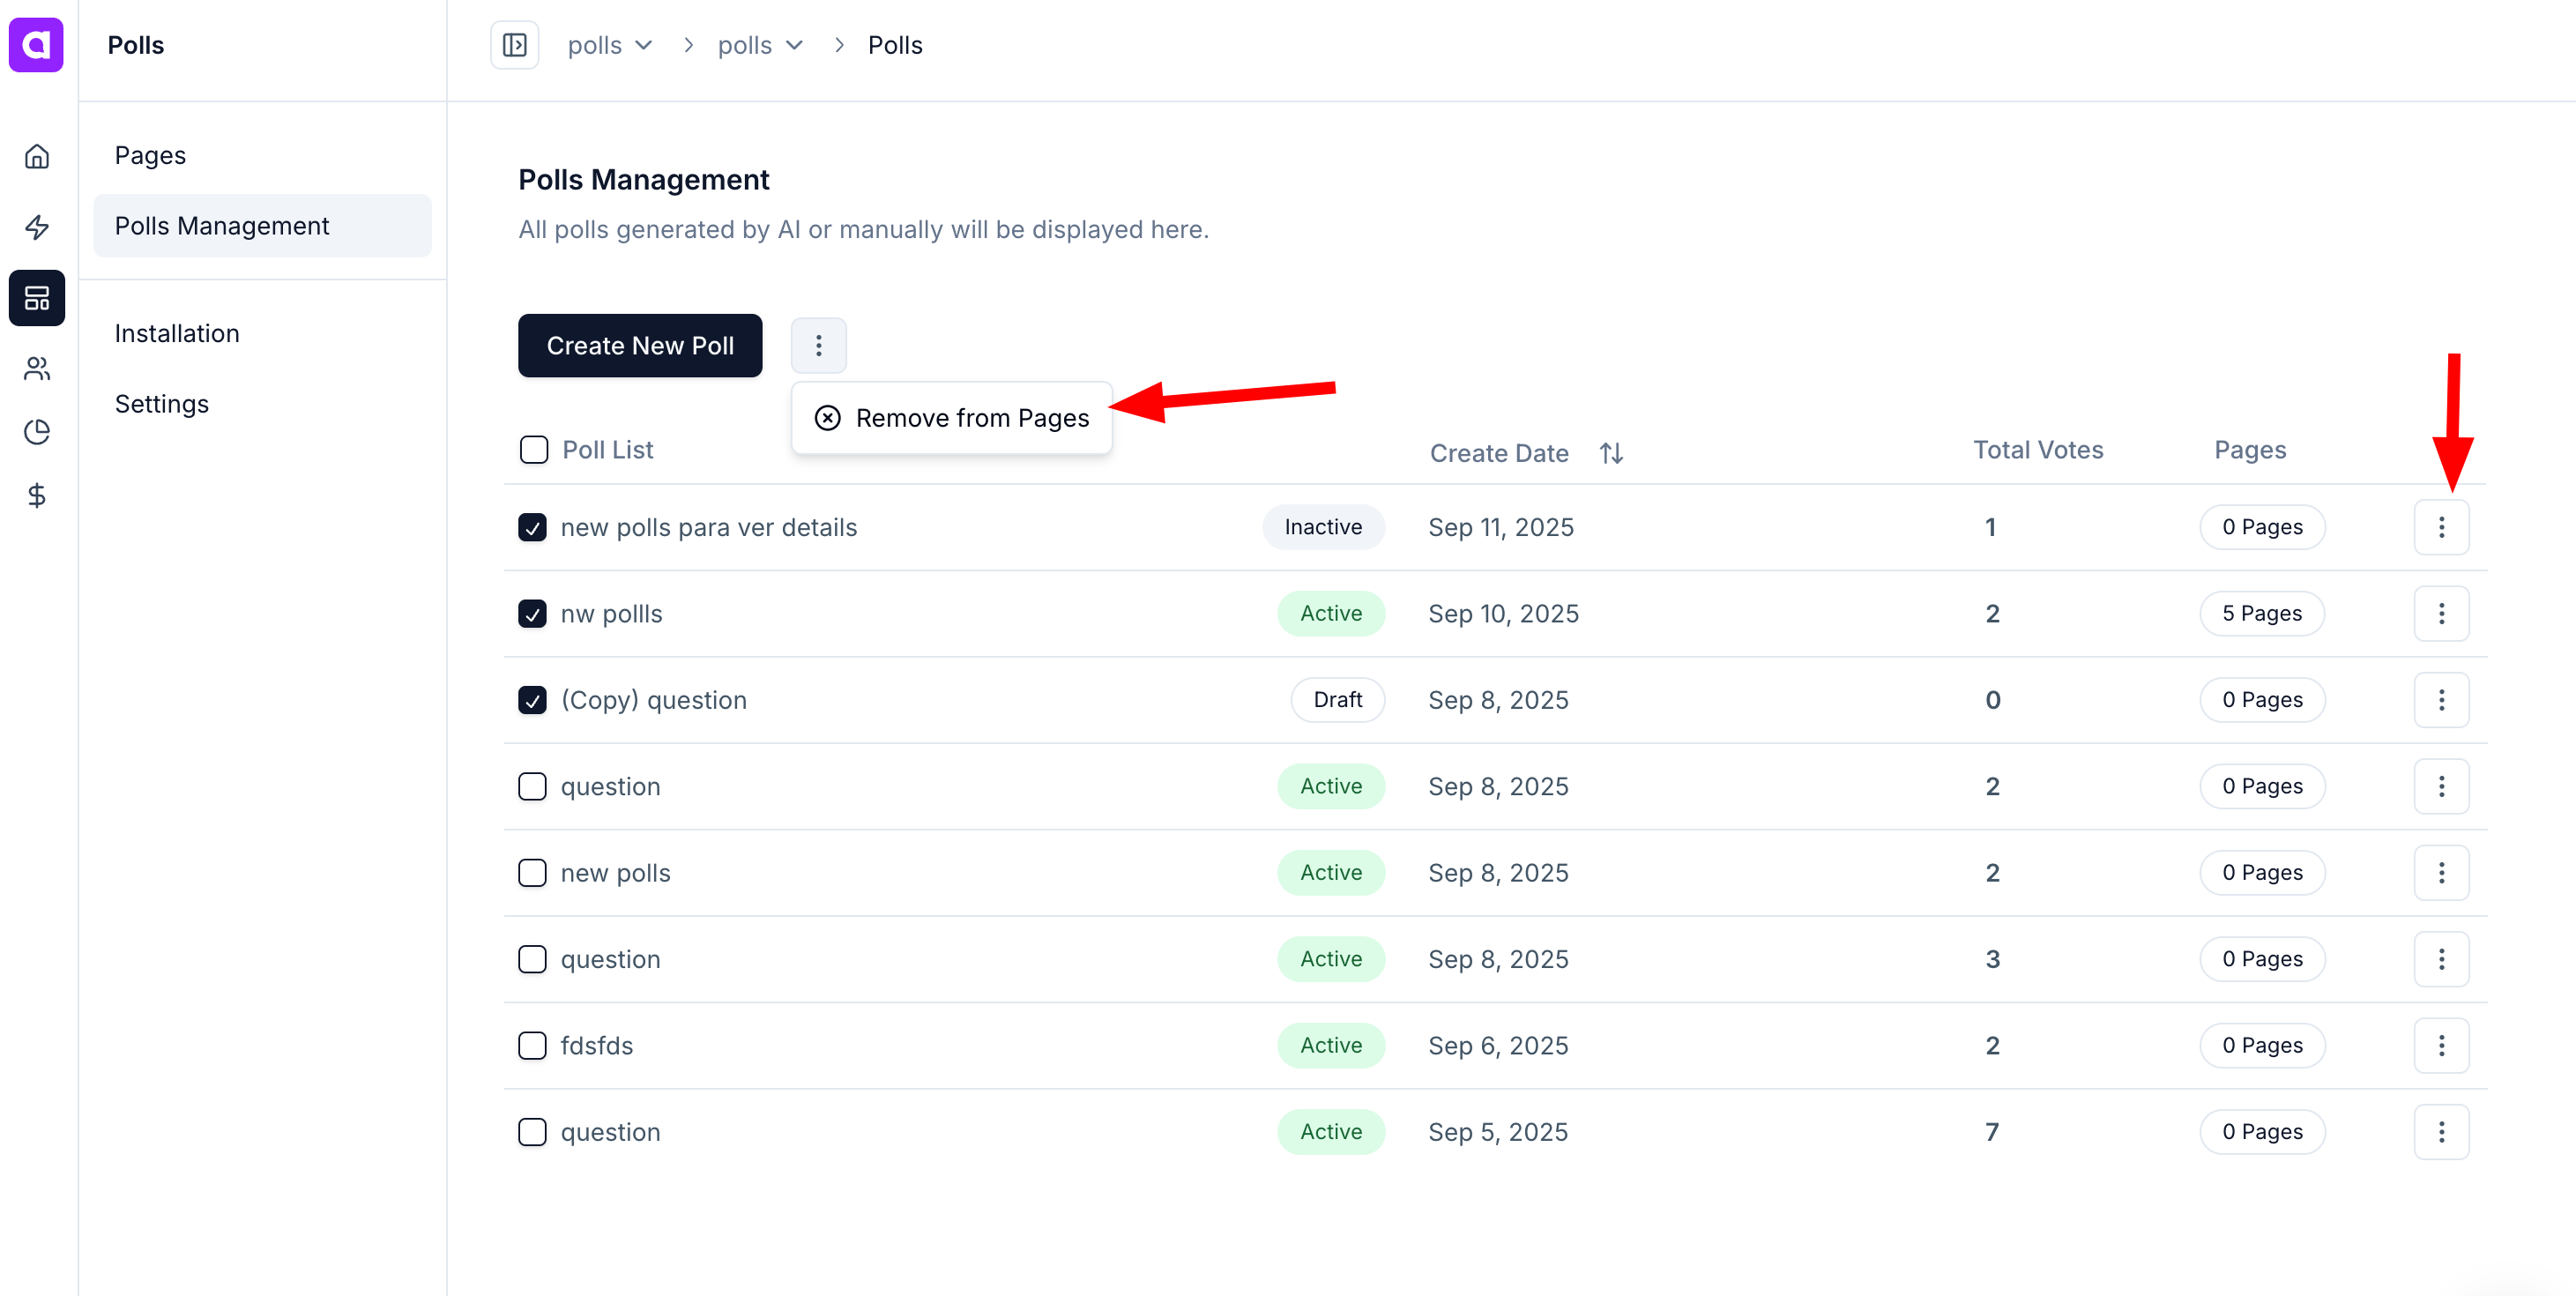
On the Polls Management page, you can view all the polls that have been created.
You can check the creation date, the total number of votes so far, and how many pages each poll is associated with.
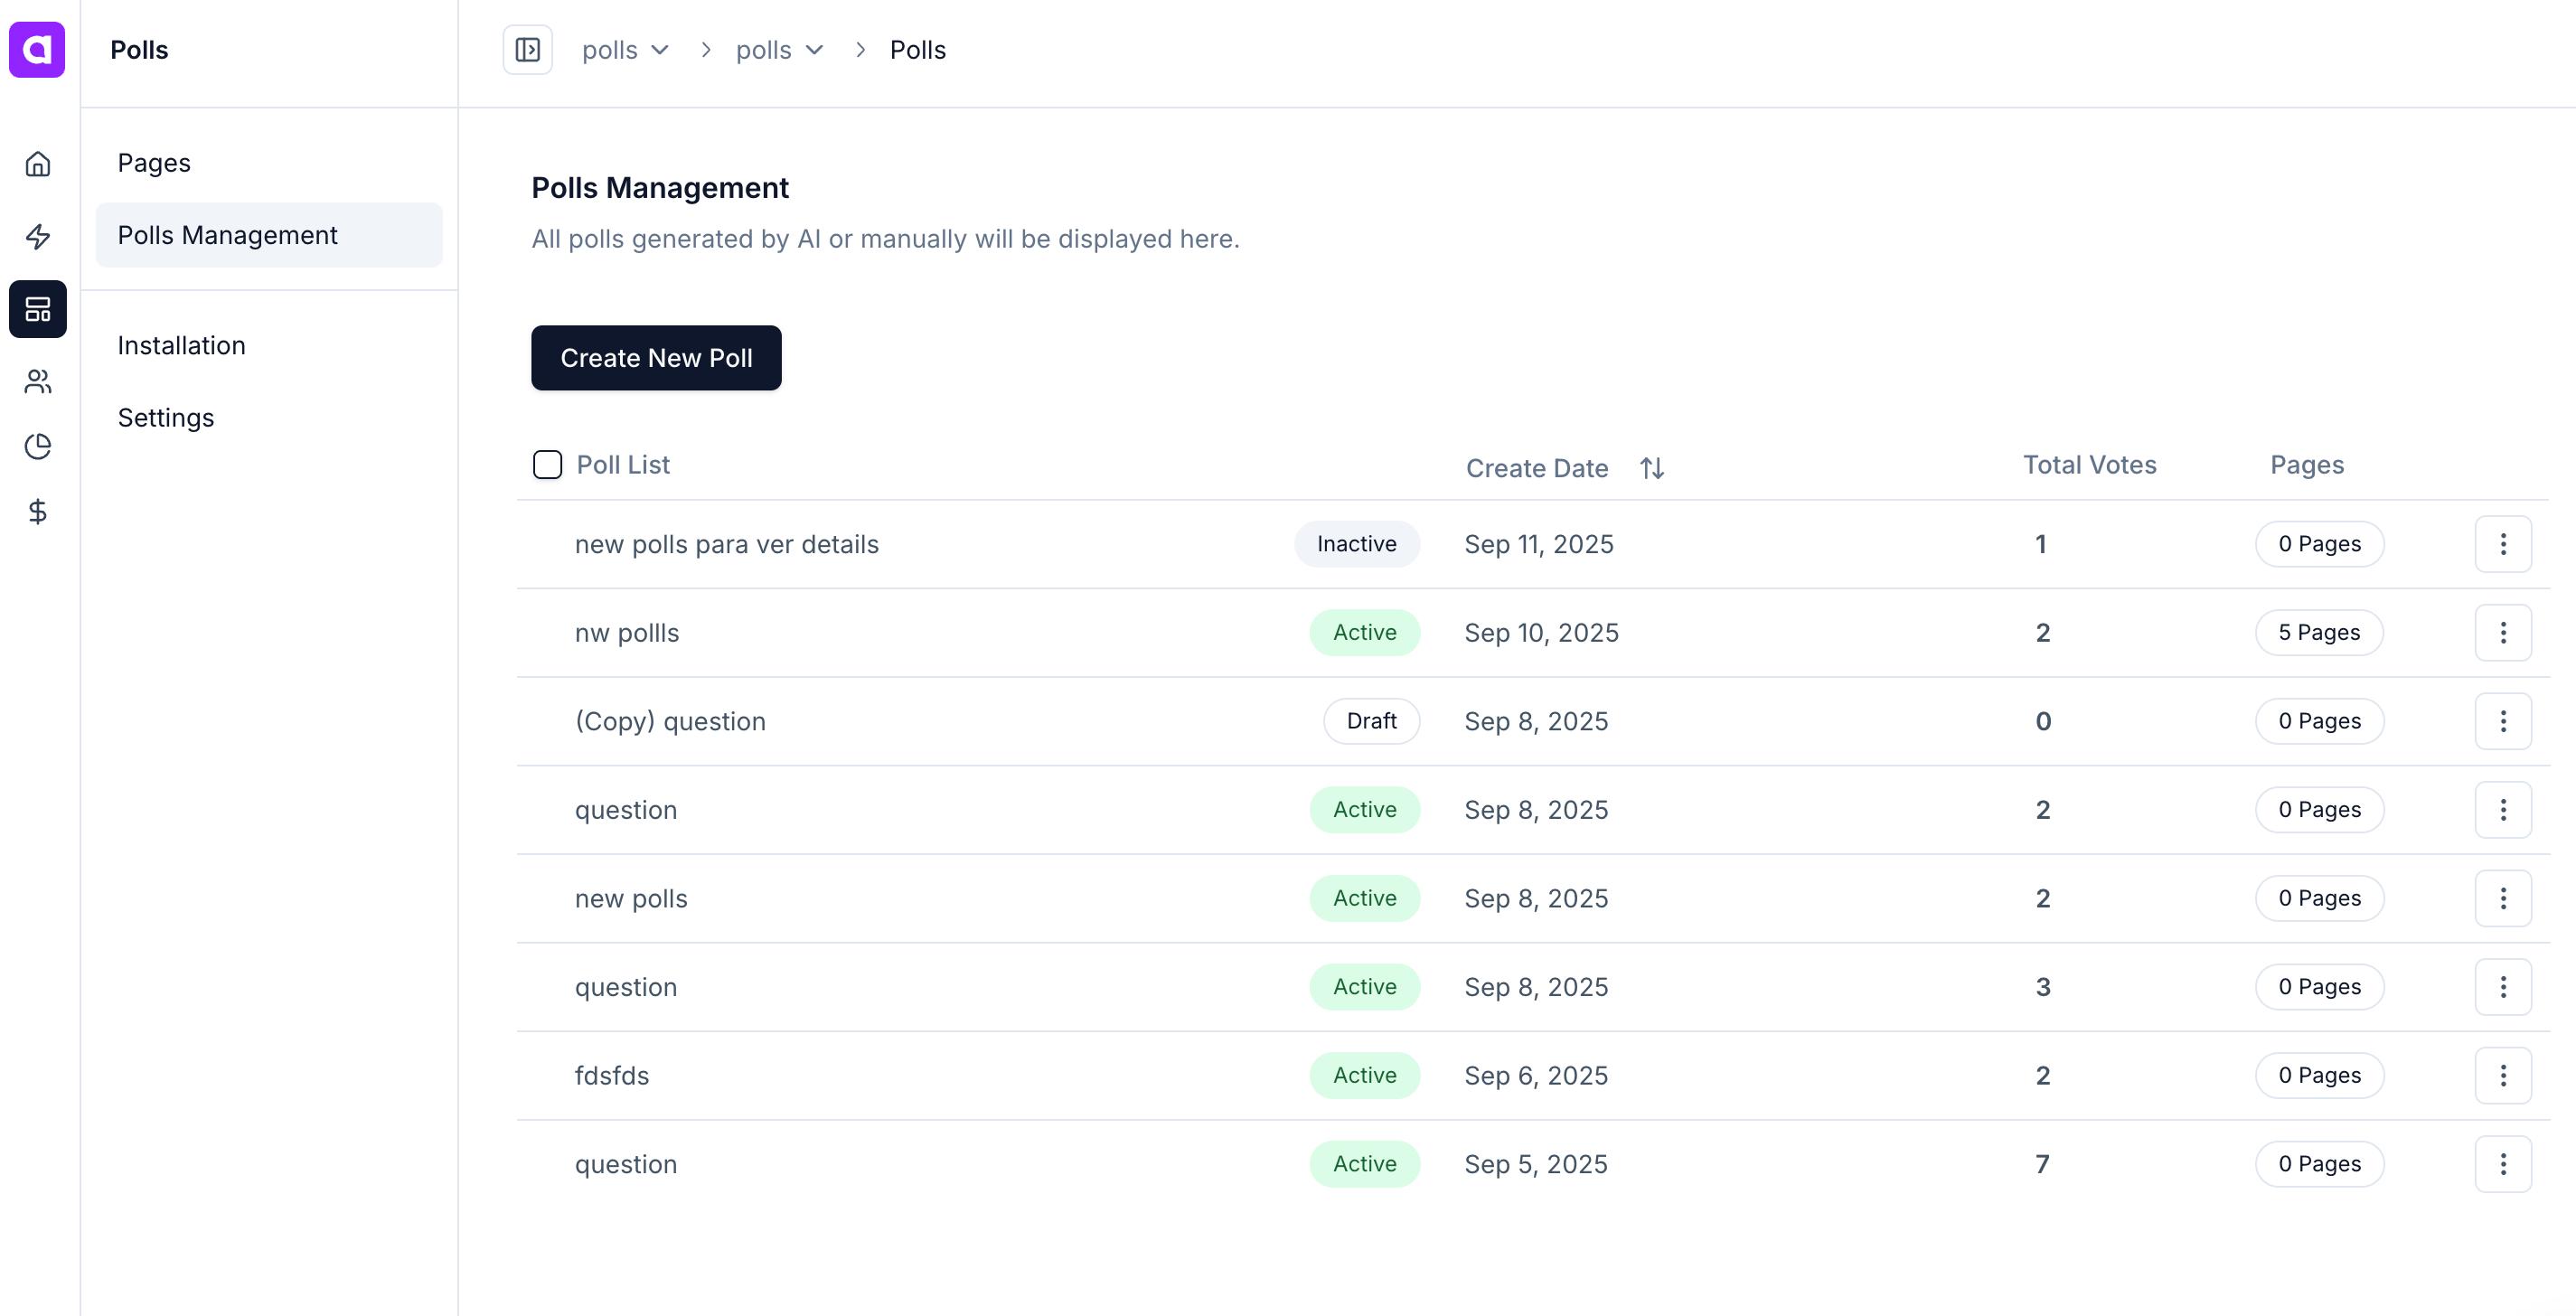
In addition, you can remove the selected polls from pages, clone a poll, or create polls in advance and schedule them to be published later.
Simply select the desired polls and click on the three-dot menu.
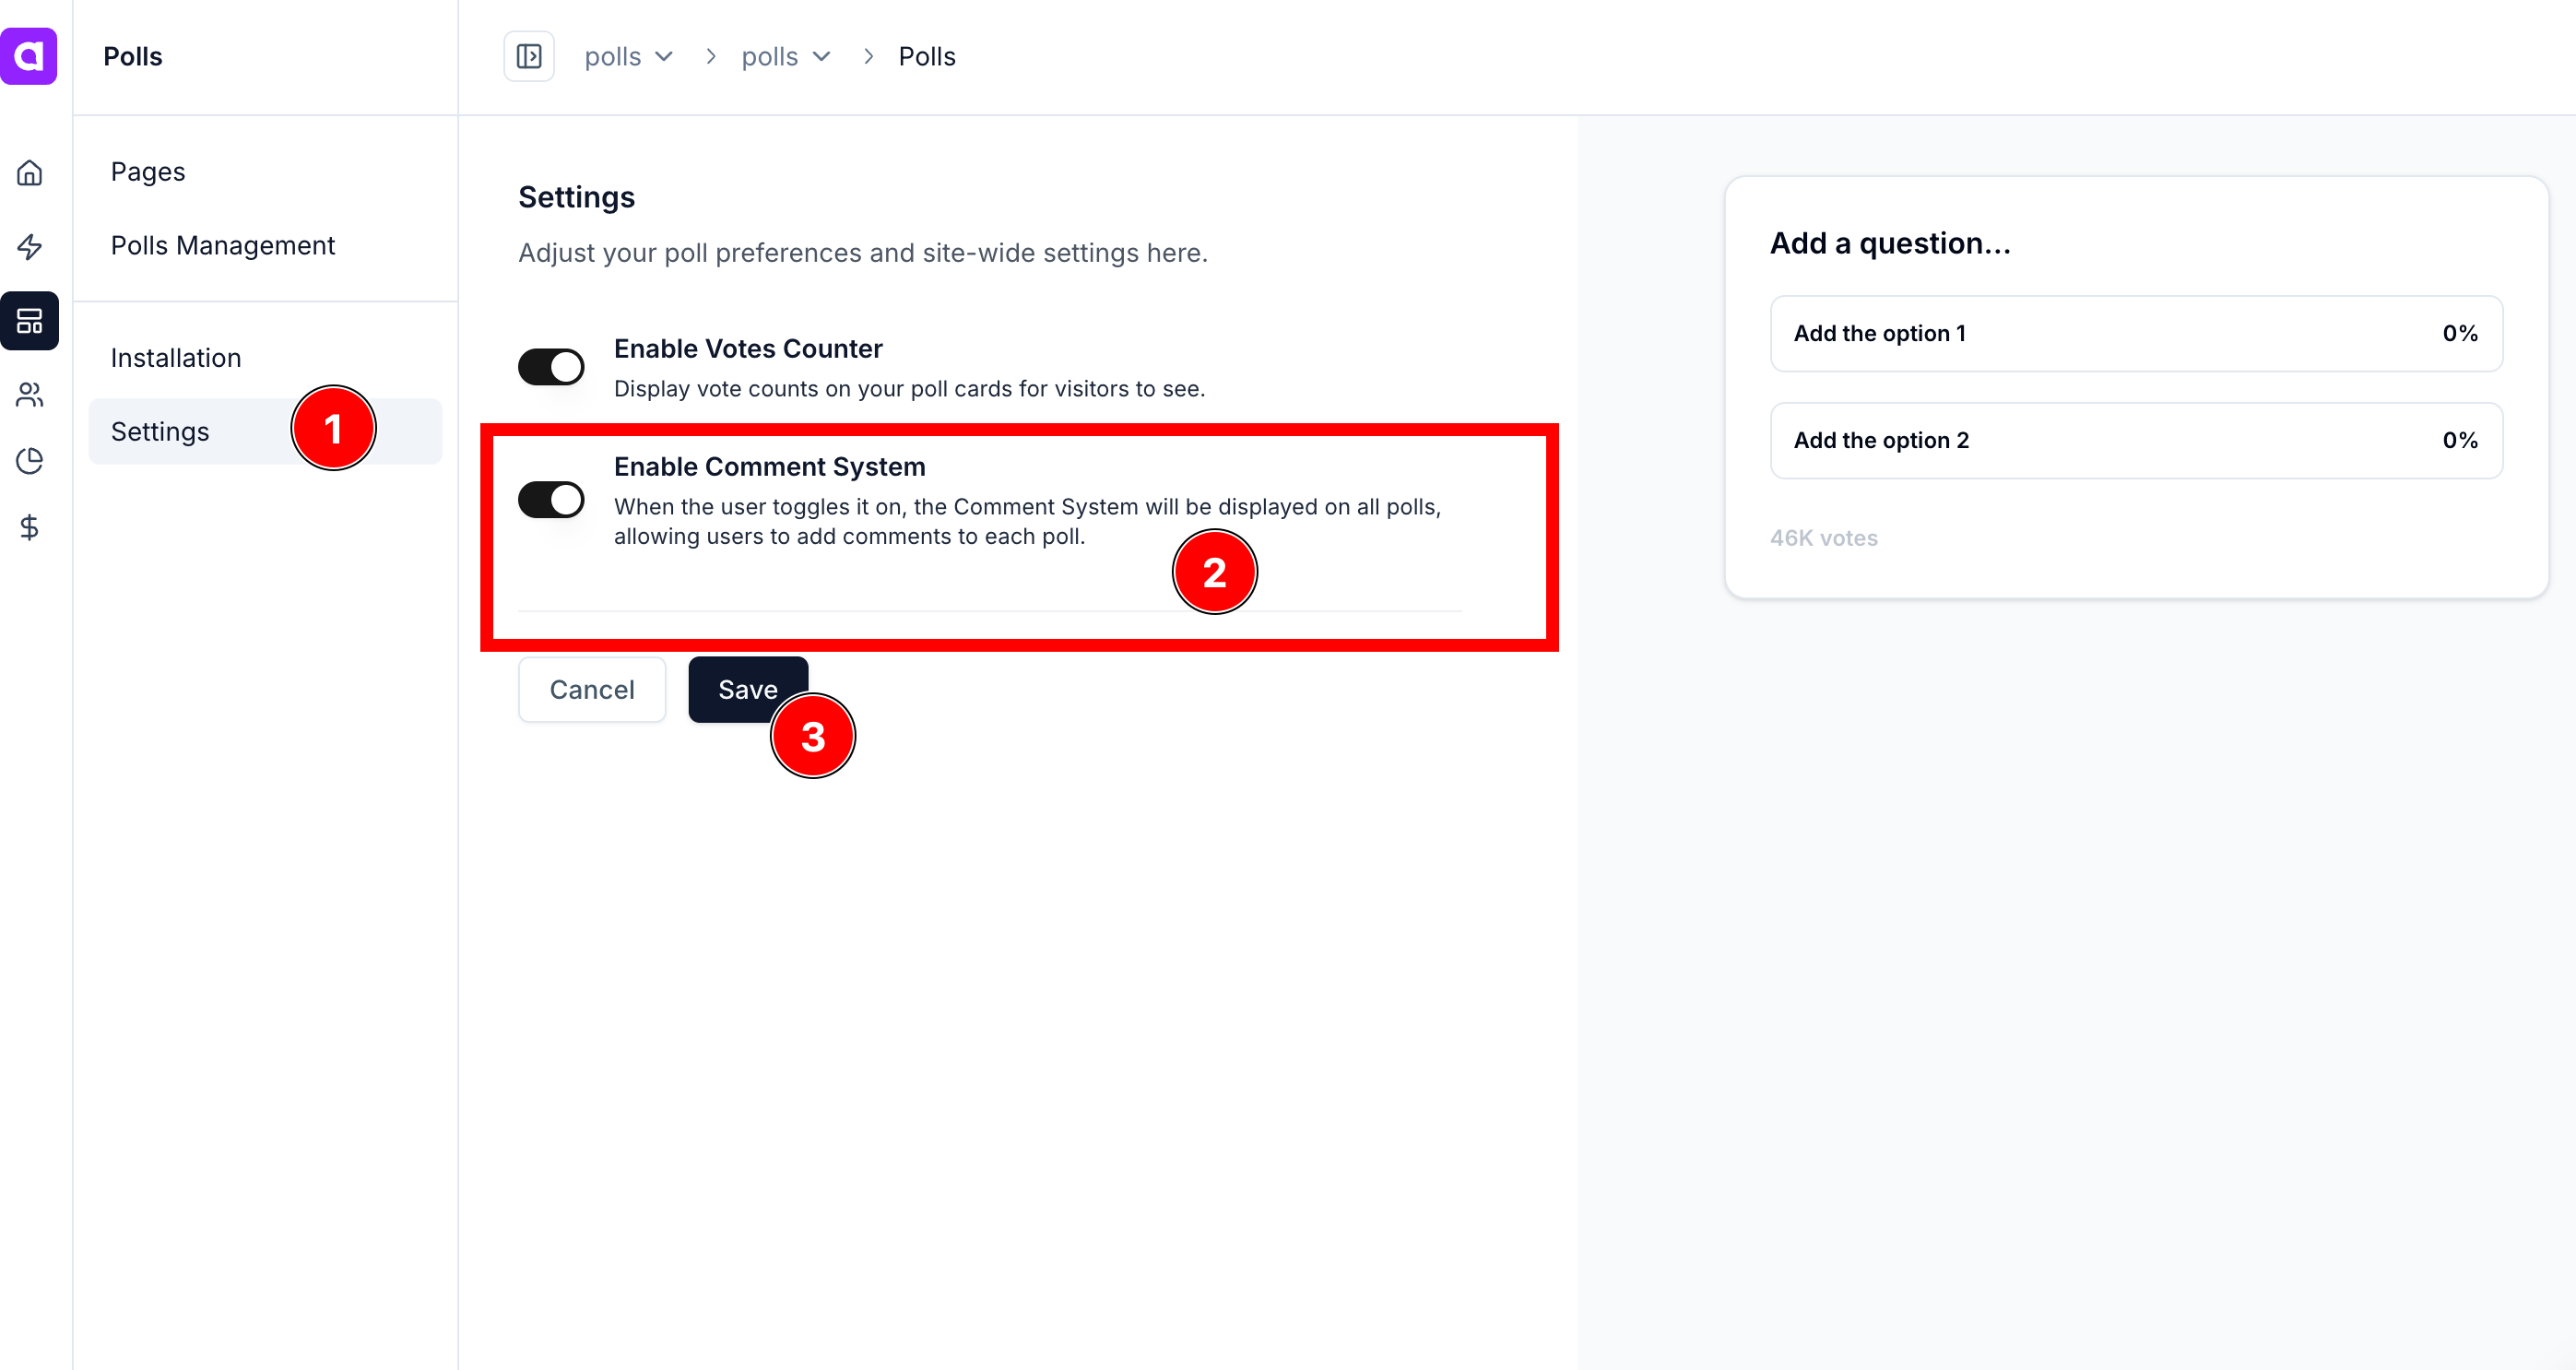
5. Enabling the Comment System on your Polls
To enable the Comment System on your polls, it’s simple: go to the Settings tab and turn on the Enable Comment System option.
This will allow all polls on your site to have the comment feature.
Note that this change may take a few minutes to reflect on your site.
Recommendation
- Paste the snippet in your blog post at the position where users will have the best access to view the poll.
- After pasting the snippet, publish or update the post.
- The Polls will appear on your page.
- From the dashboard, the owner of the account can create new polls.
QuestionsReach out to [email protected] or join live support inside the dashboard.
Updated 11 months ago