Installation
Arena’s Live Blog lets you create multiple unique blog instances tailored to your website or application. The Embed option is recommended for its flexibility across various page layouts.
Prerequisites
Before you begin, make sure you have:
- An Arena account with a registered site.
- Access to your blog’s post editor (no technical skills required).
When to Use This Method
- You want to add live blogs to blog posts without coding.
- You’re a non-technical user managing content.
- You need separate live blogs for different posts/pages.
Steps
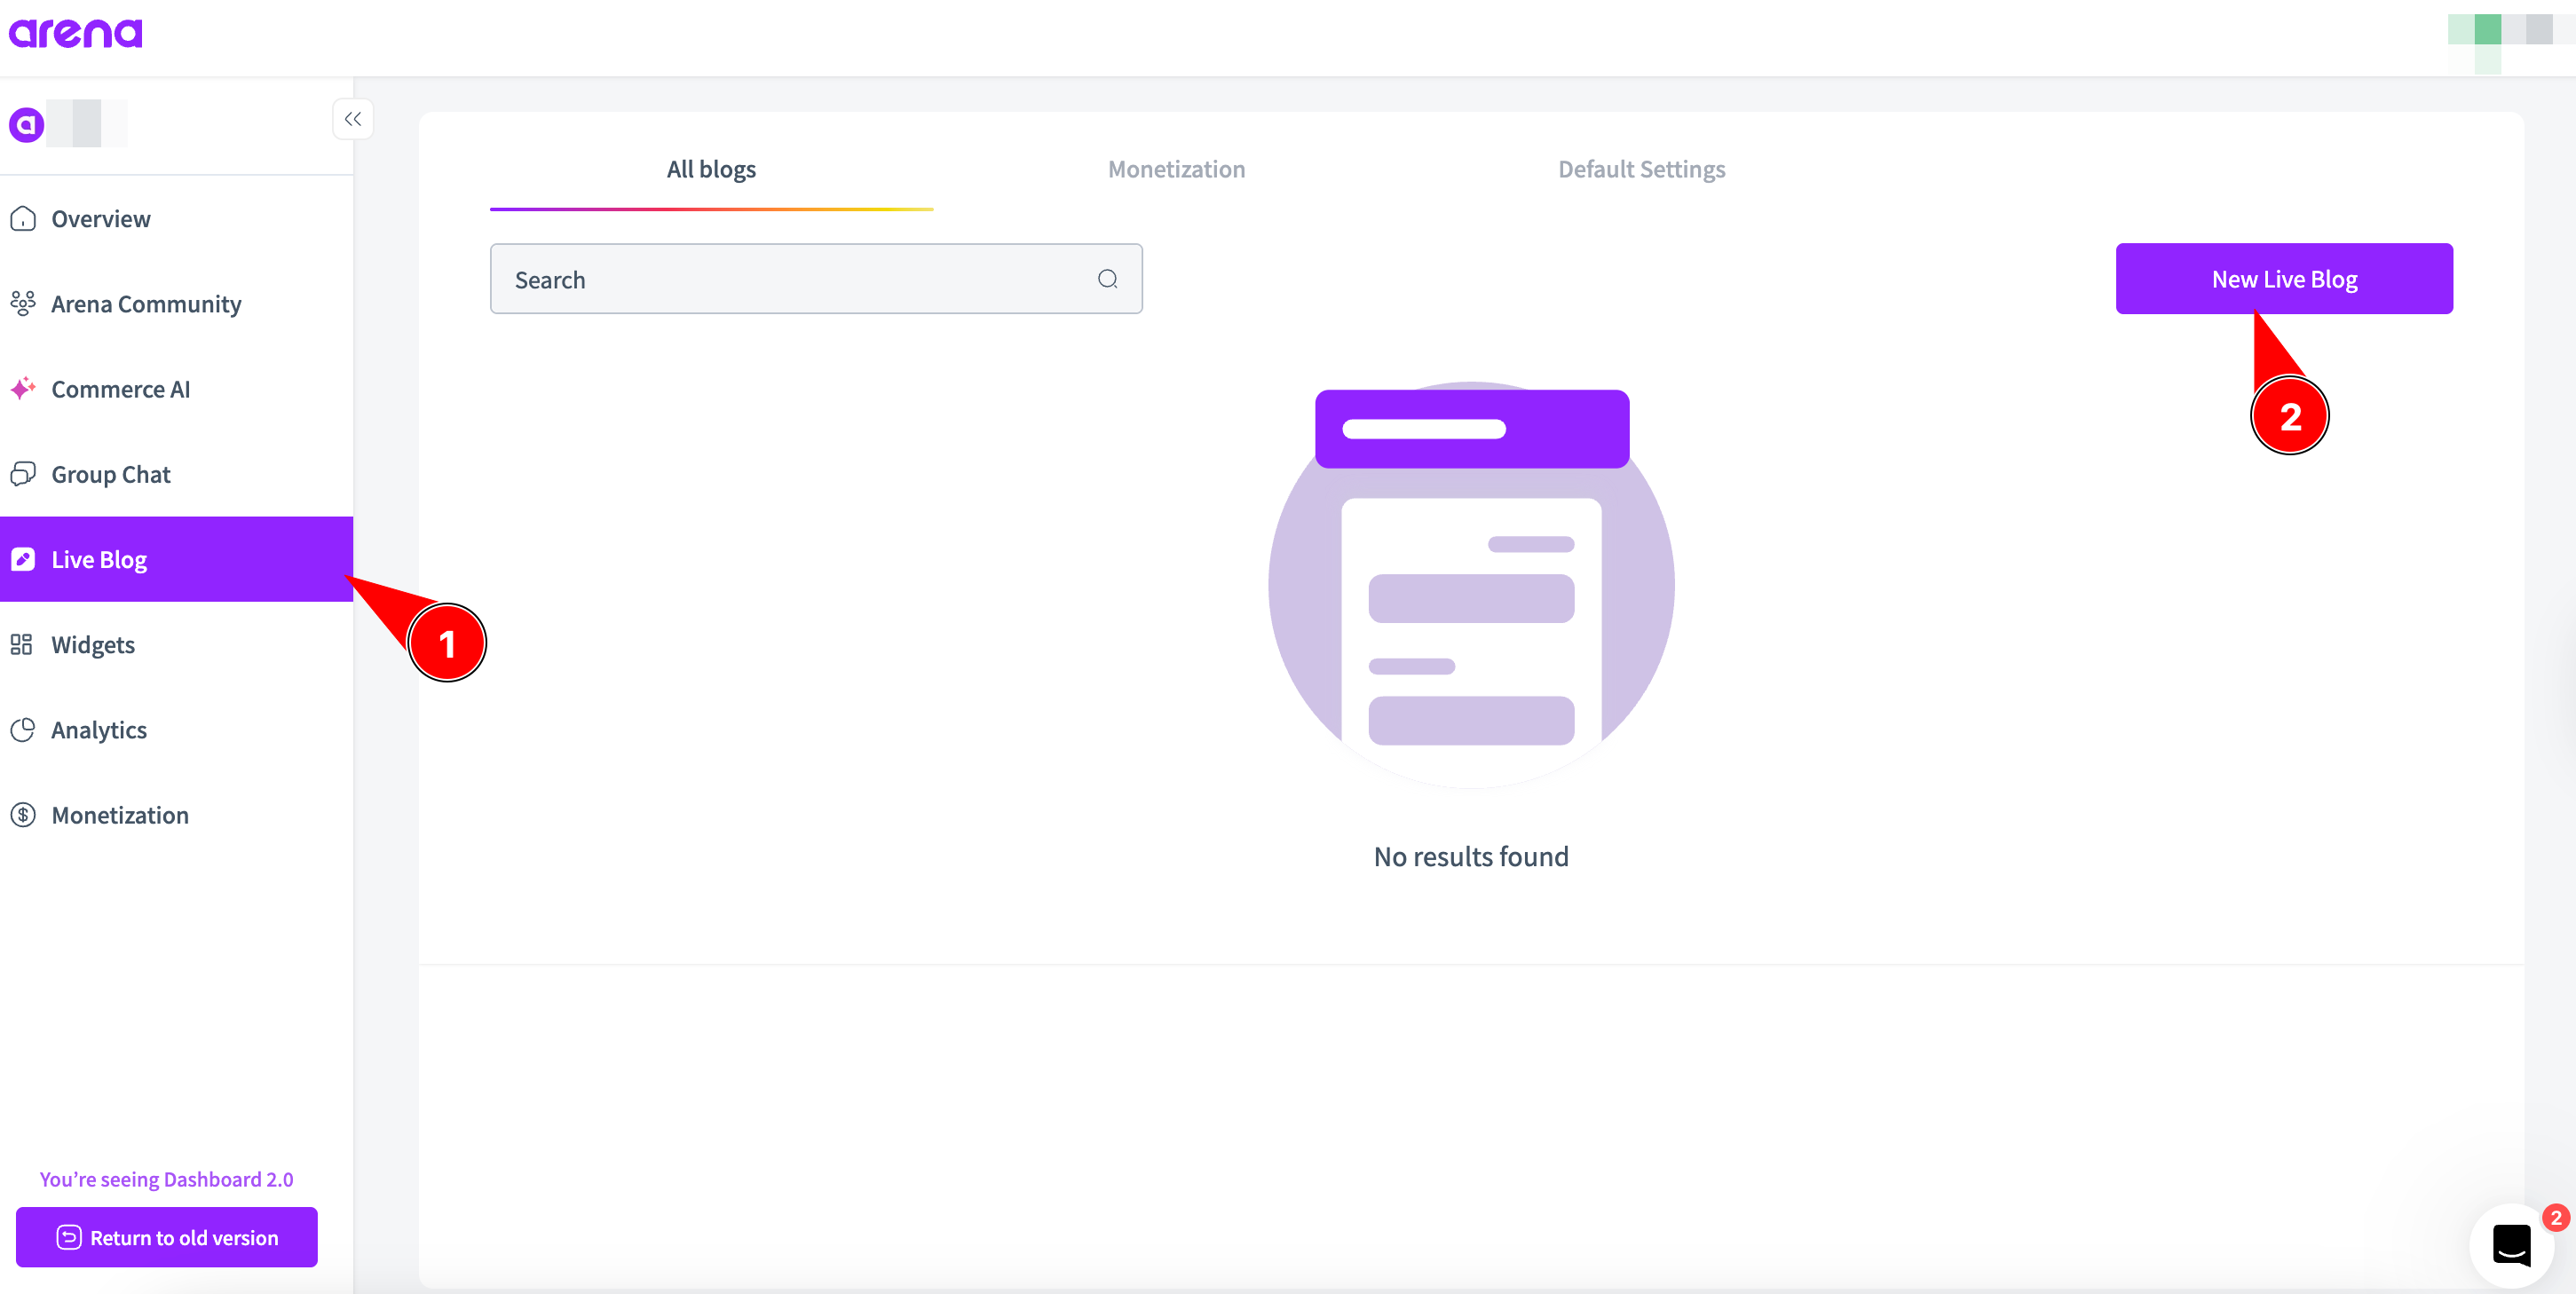
Step 1: Access your Arena Dashboard
Navigate to Live Blog > New Live Blog in your Arena account.
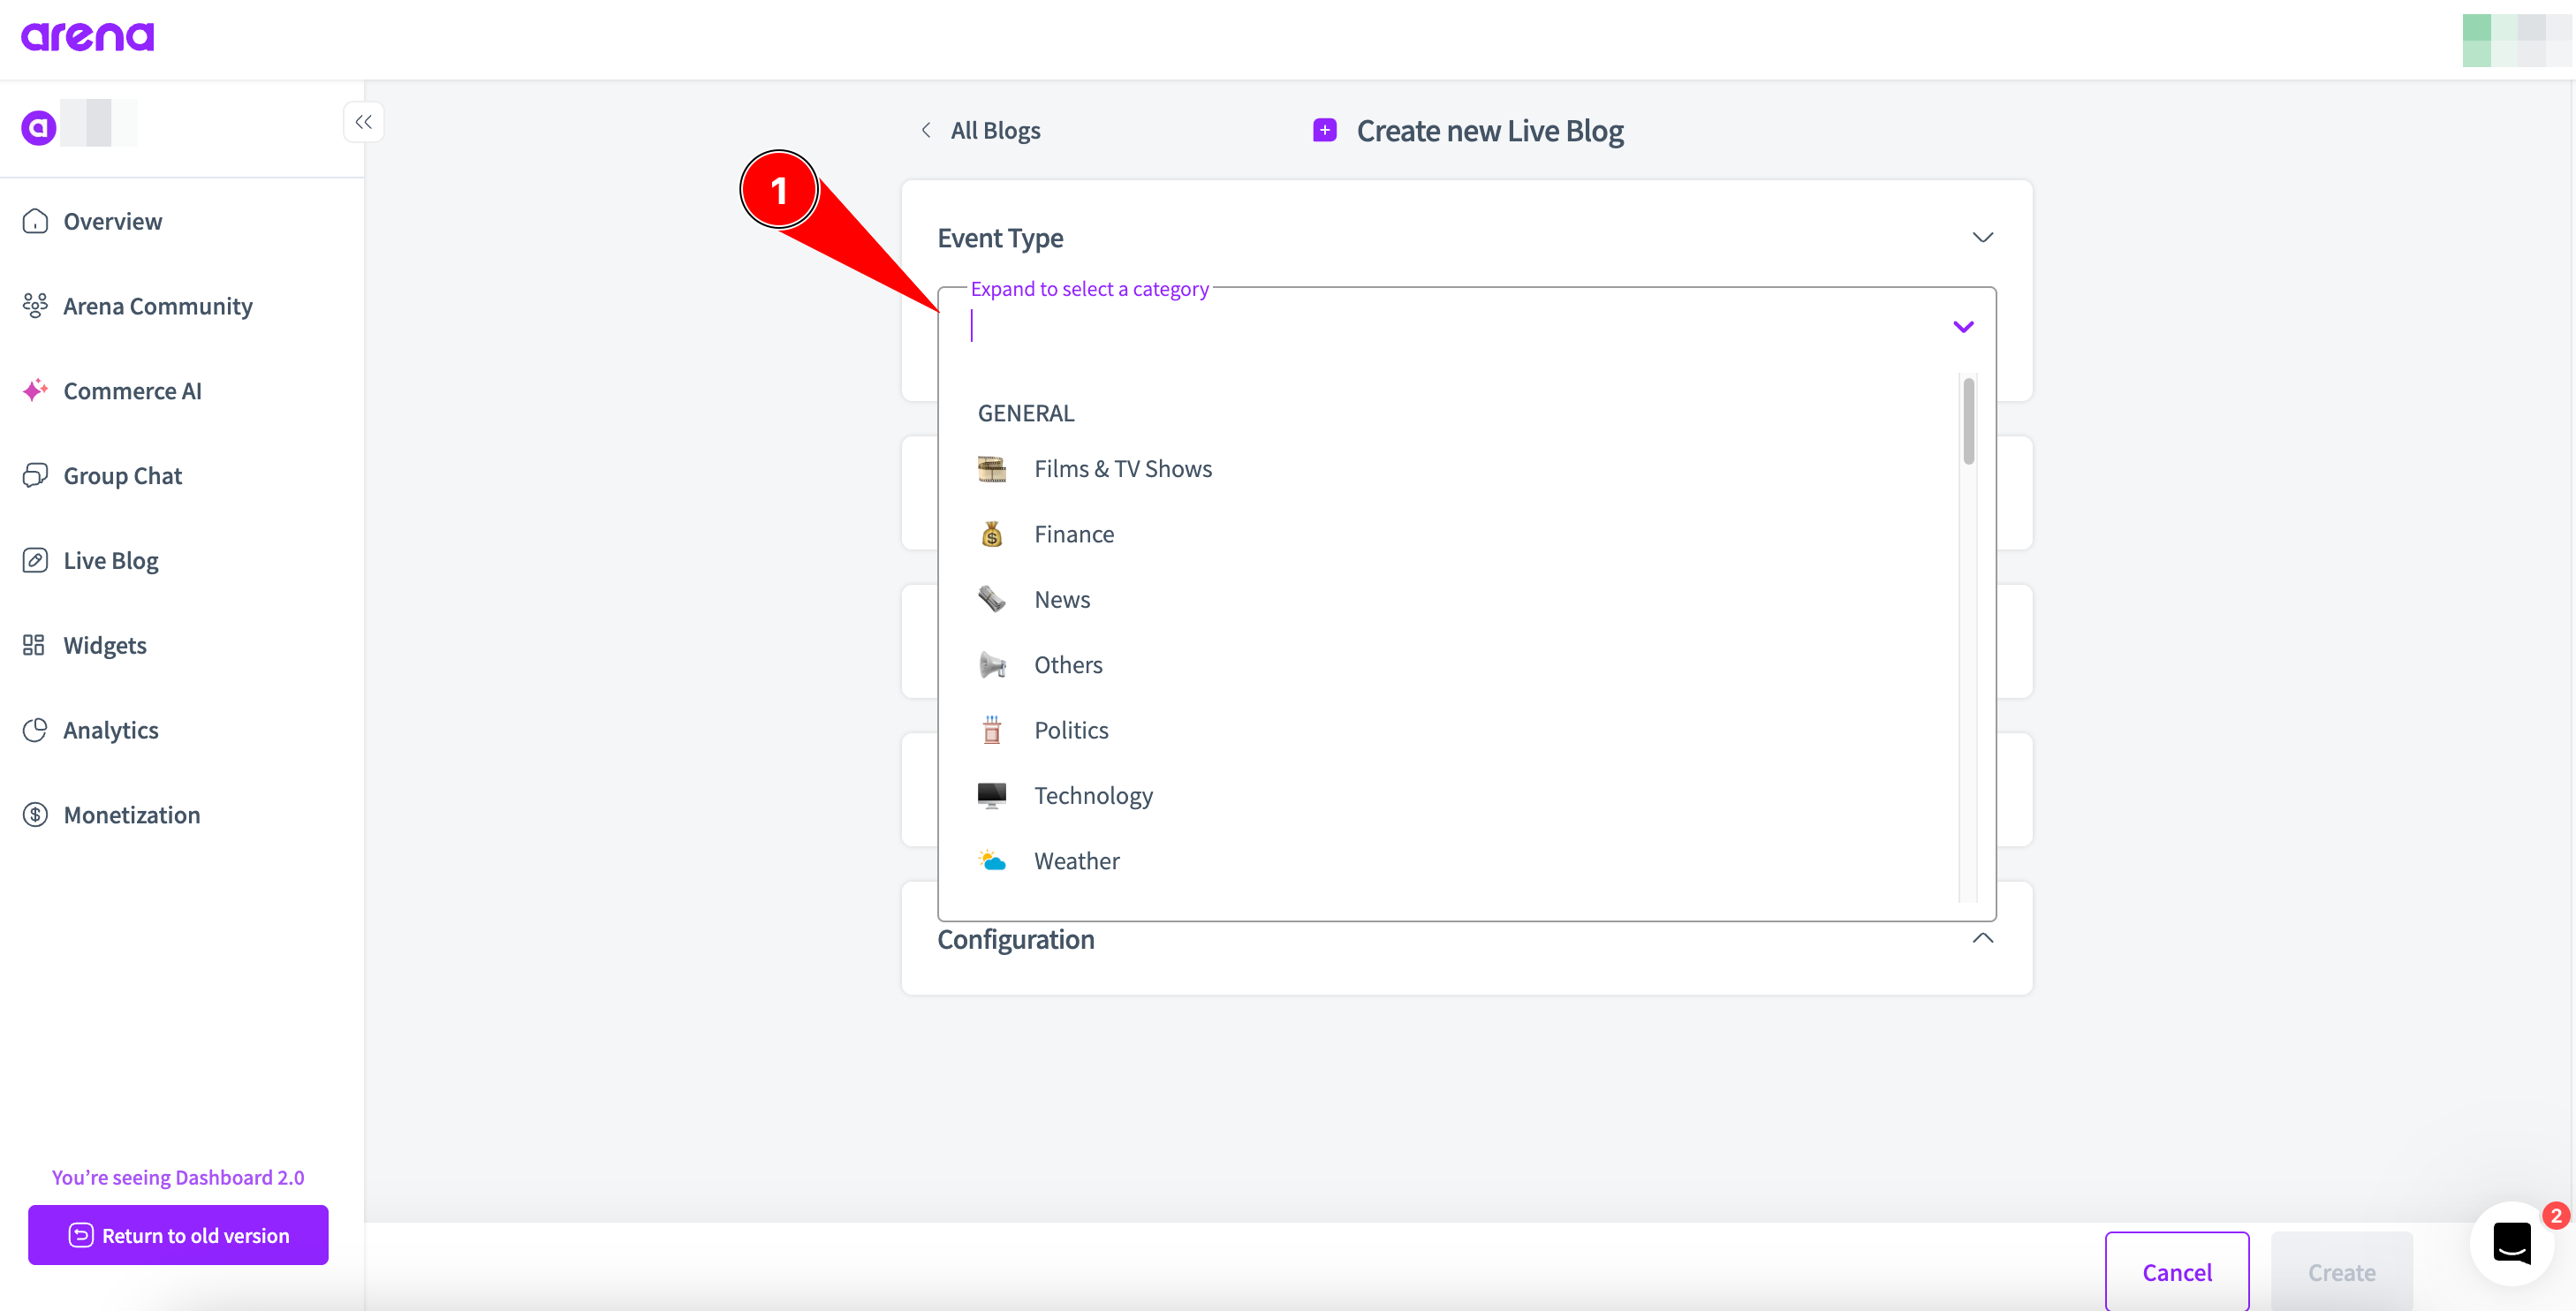
Step 2: Select the Live Blog type
We have two main possible blog groups:
- General News Blogs (News, Weather, Finance, Politics and Others).
- Sports (Covering top global sports such as American Football, Soccer, Basketball, Cricket, Baseball, and Others).
Step 2: Set the basic information for your Blog
For General Blogs:
- Enter a name for your Blog.
- Select the Date.
- Select the language and click on Create.

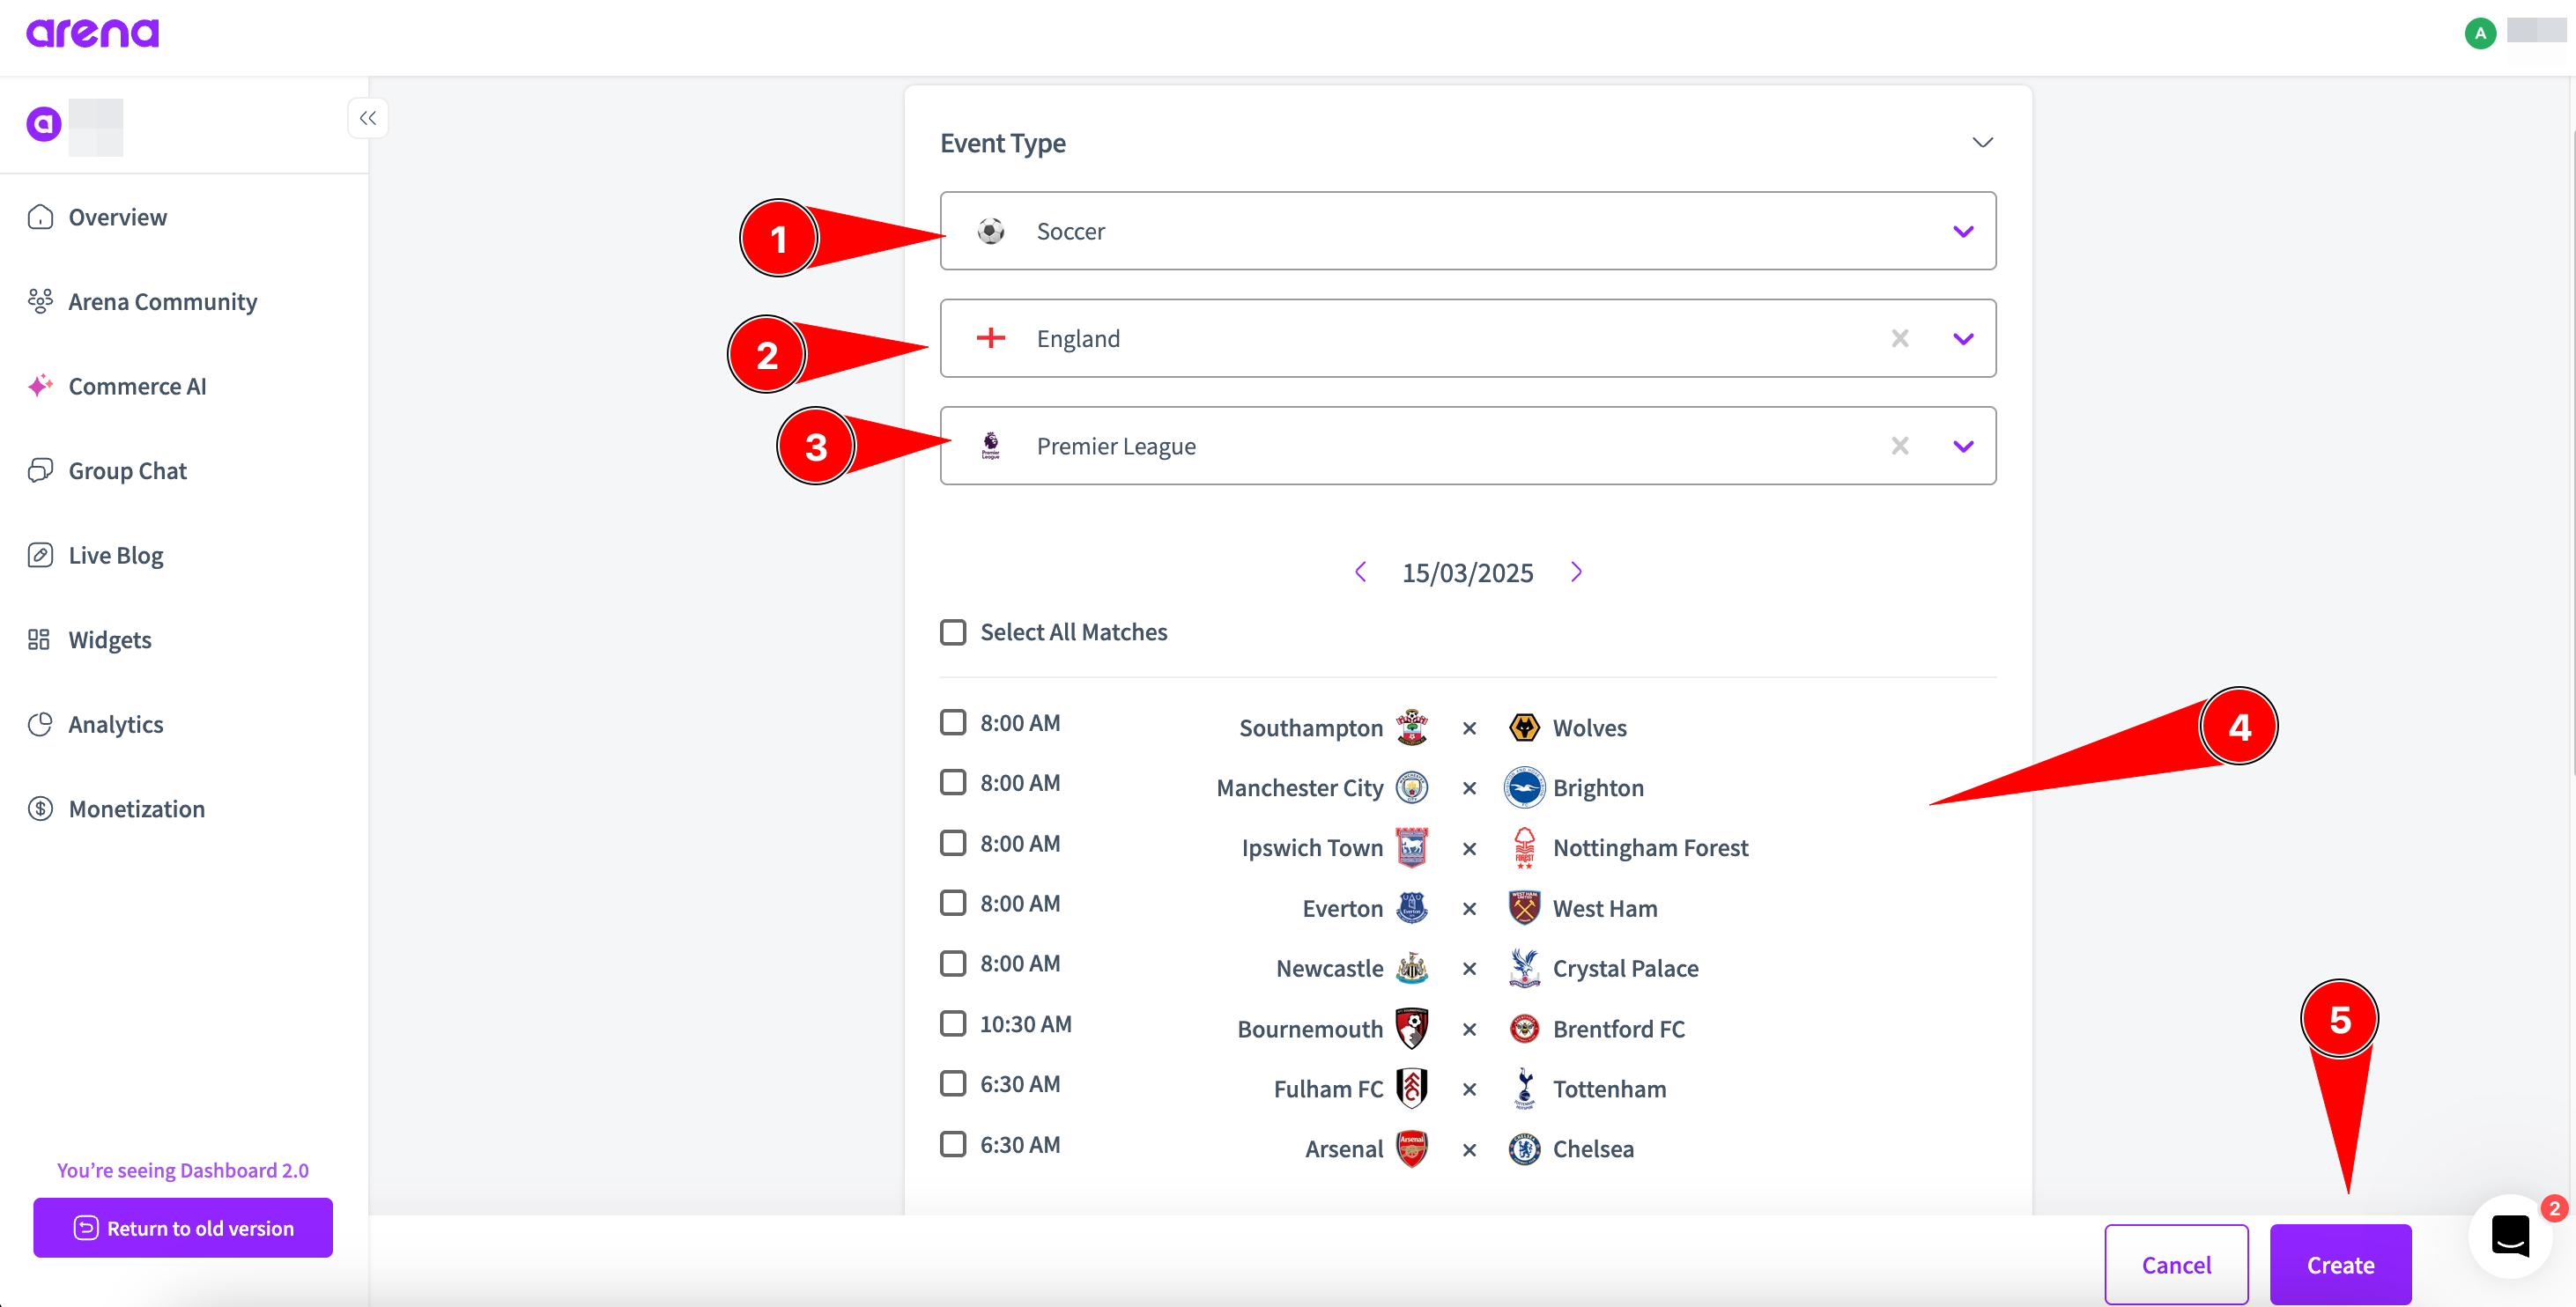
For Sports Blogs:
- Seletect the Sports category.
- Select the country to help you filter the Tournaments (optional).
- Select the Language.
- Select the event in the Calendar and click on Create (you can create more than one Blog by selecting many matches).
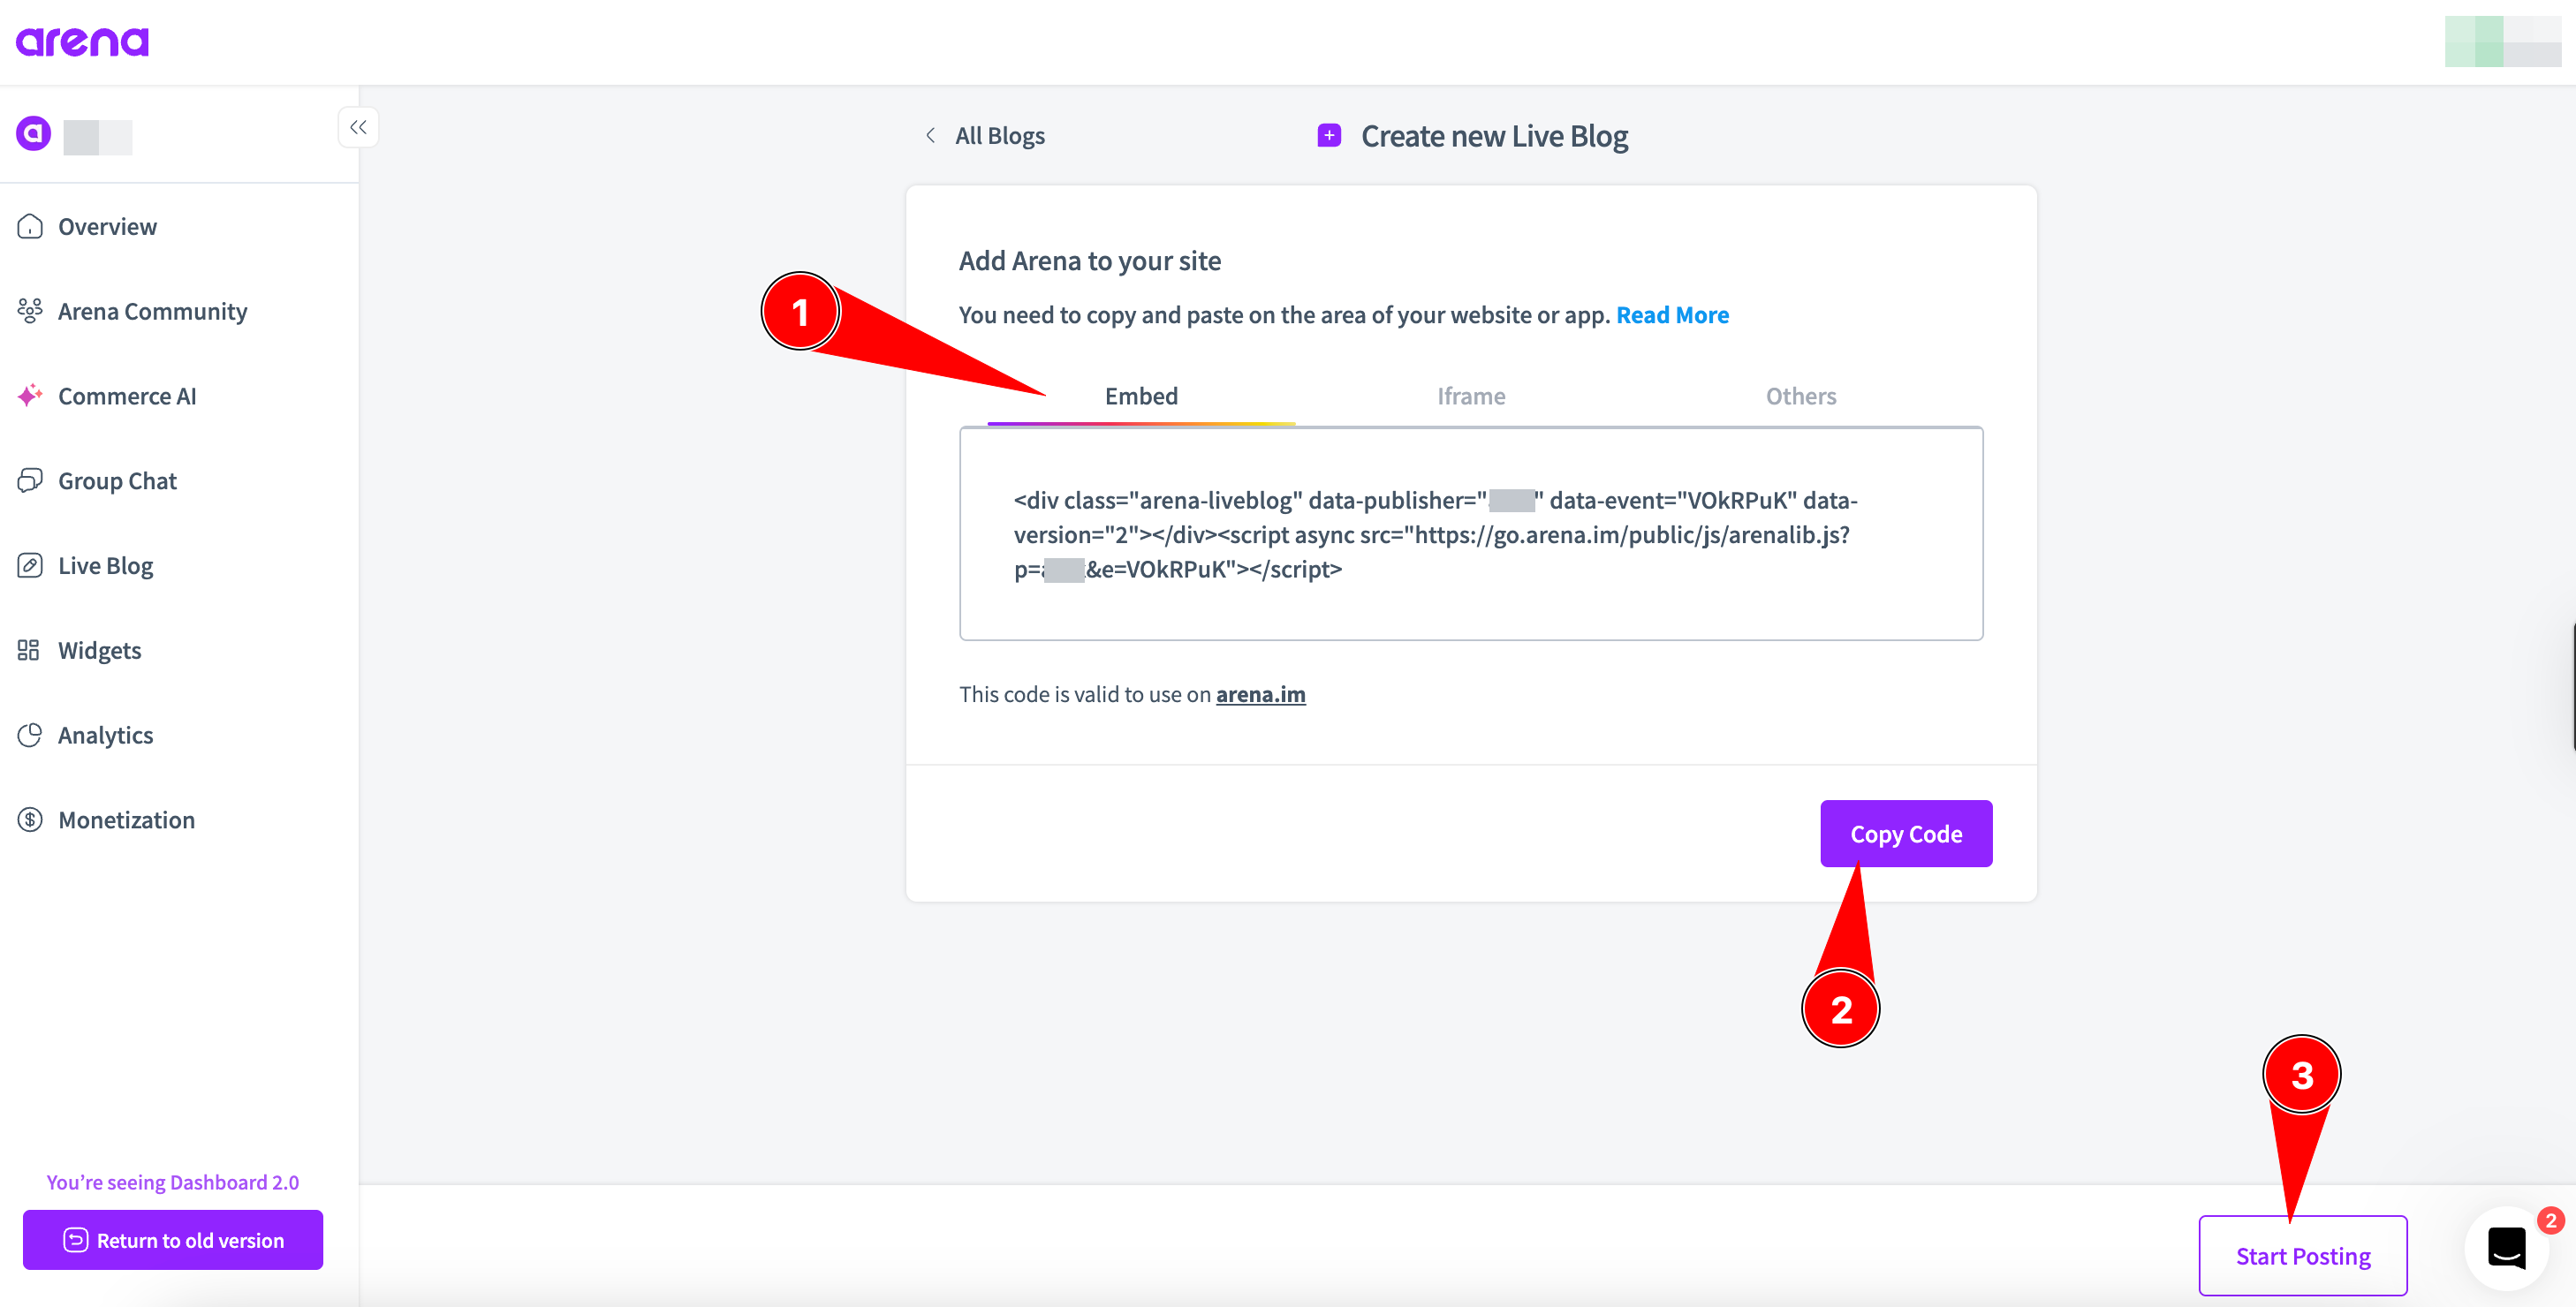
Step 3: Snippet (Embed code)
We recommend Embed for its simplicity and adaptability.
- Copy the provided code snippet.
- Paste the snippet into your blog post editor where you want the Live Blog to appear.
- In the dashboard, click Start Posting to integrate your social accounts and create posts
Recommendation
- Paste the snippet at the end of your blog post in the editor to add a unique Live Blog.
- After pasting the snippet, publish or update the post.
- The Live Blog will appear on your page.
- From the dashboard, the owner of the event can create posts.
QuestionsReach out to [email protected] or join live support inside the dashboard.
Updated over 1 year ago
Did this page help you?